If you’re looking for some Zentangle pattern inspiration, you’ve come to exactly the right place.
Whether you’ve been tangling for years or you’re just discovering this beautiful art form for the first time, this collection of 10 step-by-step patterns is here to spark your creativity and guide your pen.
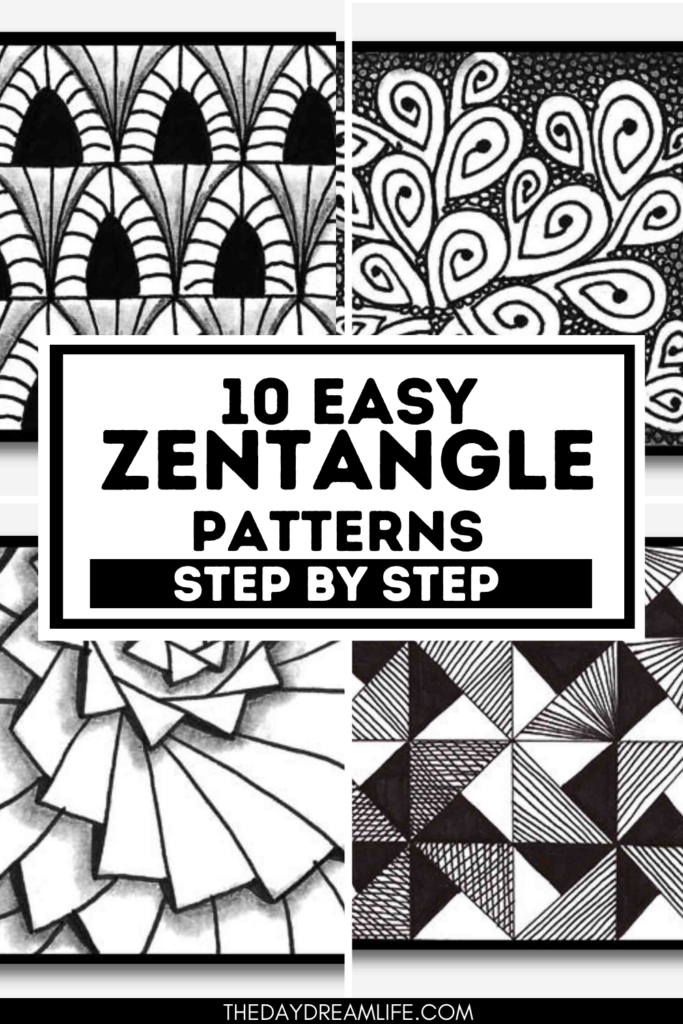
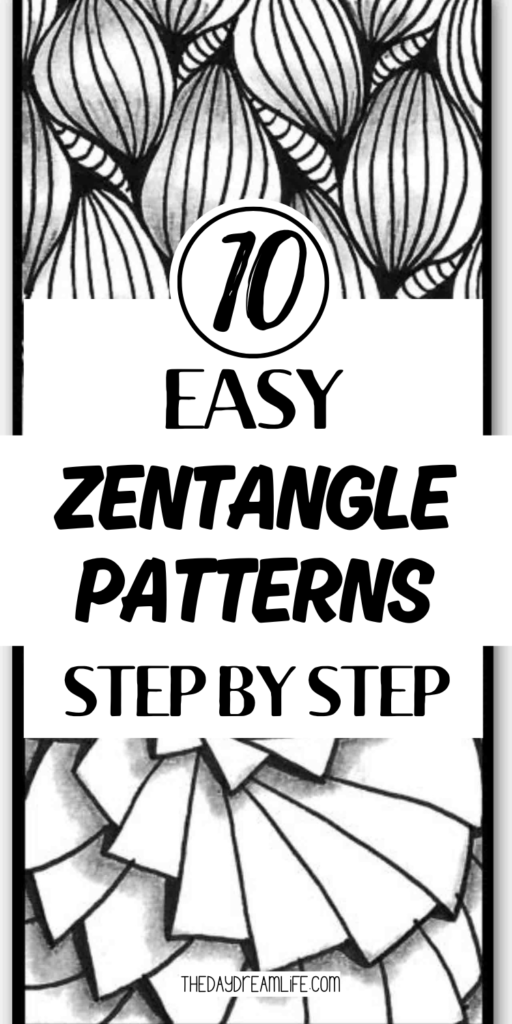
Pin me for later!
In a world that rarely slows down, there’s something quietly revolutionary about picking up a pen and losing yourself in a pattern. That’s the magic of Zentangle — a meditative drawing method built around repetitive, structured designs that are as calming to create as they are beautiful to look at.
Each pattern in this post is broken down into simple, manageable steps — just like the ones shown above — so you can build something intricate and deeply satisfying without needing any special skills or prior experience.
Zentangle is one of those rare creative practices that is as good for the soul as it is for the sketchbook.
The rhythmic, intentional nature of drawing patterns pulls your attention gently into the present moment — a state of calm focus often called “flow” — where the noise of everyday life simply falls away.
Many people find it becomes a favourite way to unwind after a long day, a mindful morning ritual, or simply a joyful excuse to sit quietly with a pen and some paper.
There are no mistakes in Zentangle, only opportunities. Every line is intentional, every finished pattern a small but meaningful achievement. Over time, the practice builds not just artistic confidence, but patience, creativity, and a sense of calm that carries into daily life — and that’s a pretty wonderful thing.
So settle in, find a quiet moment, and let these 10 beautiful Zentangle patterns be your guide. One stroke at a time, let’s make something wonderful.
1st Zentangle Pattern

Step 1: Draw two rows of interlocking loops facing each other — top loops pointing up, bottom loops pointing down — creating a delicate chain-like ribbon running across your tile.
Step 2: Lightly draw two oval shapes over the ribbon, sitting side by side and overlapping slightly in the centre. These are just a guide, so don’t worry about making them perfect.
Step 3: Trace around each oval in pen, but where they overlap, weave the line so one oval passes behind the other — instantly making your two circles look interlinked like a chain.
Step 4: Shade the overlapping section where the two ovals weave together, building up tone gradually to give it a rounded, three-dimensional finish.
2nd Zentangle Pattern

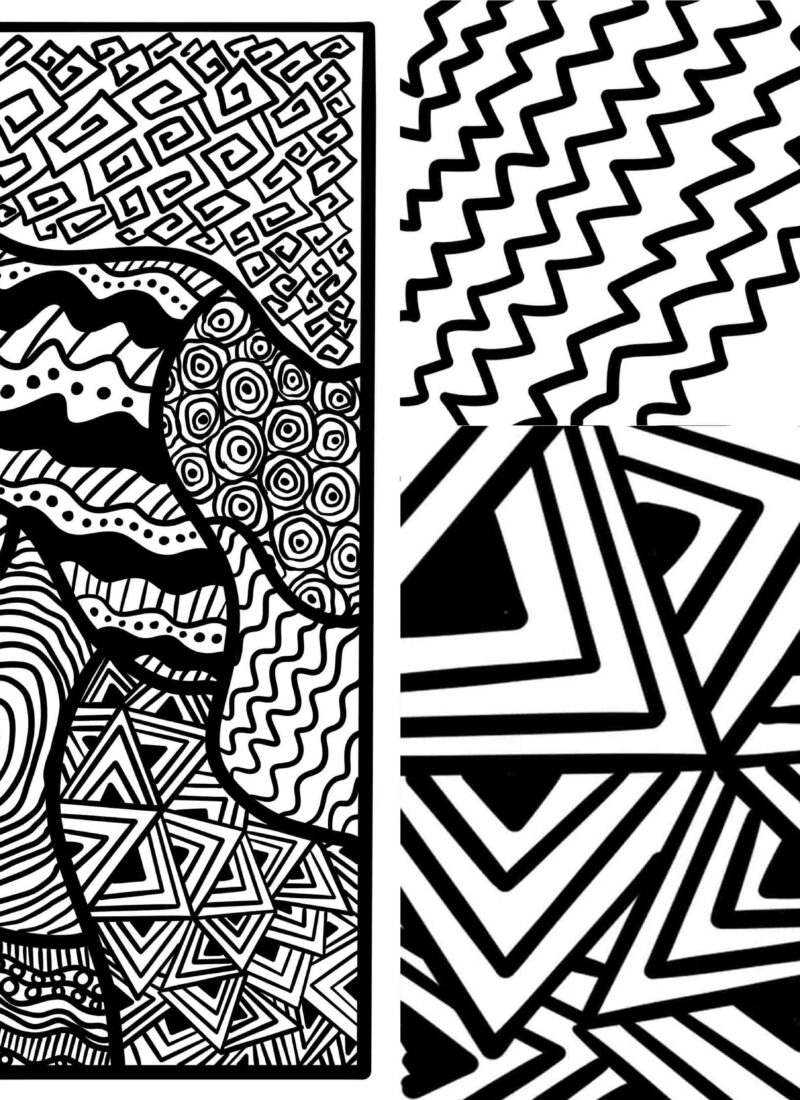
Step 1: Draw several wavy vertical lines across your tile, each one gently curving in and out to create a series of hourglass shapes running from top to bottom.
Step 2: Add a second set of wavy lines running diagonally across the first, crossing through the narrow waist of each hourglass to begin dividing the tile into petal-like sections.
Step 3: Continue adding diagonal lines in the opposite direction, weaving across the tile until the intersecting curves create a full grid of plump, rounded petal shapes across the page.
Step 4: Fill in the small pointed sections where the lines intersect — the little triangular gaps where the petals meet — with solid black or red, making the joins pop and defining each petal shape more clearly.
Step 5: Draw fine parallel lines inside each petal shape, following the curve of the outline from one side to the other. Work carefully and evenly — this is where the pattern really starts to come to life.
Step 6: Finish by adding crosshatch lines in the dark intersecting sections and refining your line work throughout. The result is a rich, full pattern that looks incredibly intricate but is built entirely from simple repeated curves.
3rd Zentangle Pattern

Step 1: Start by drawing a small starburst in the centre of your tile — eight straight lines radiating outward from a single point, evenly spaced like a compass rose.
Step 2: Connect the tips of those lines with small angled strokes to form a neat eight-pointed star shape in the centre of your tile.
Step 3: Now echo the star shape outward, drawing larger and larger versions of the same star around it, keeping the points aligned.
Continue until the expanding star fills the entire tile, the points eventually bursting out beyond the edges.
Step 4: Fill each section between the star outlines with close parallel lines, following the angle of each individual point.
This creates a beautiful feathered, almost three-dimensional effect that makes the whole pattern radiate with energy from the centre outward.
4th Zentangle Pattern

Step 1: Begin with a simple flowing curved line, ending in a small spiral curl — like the beginning of a gentle wave or wisp of wind.
Step 2: Add a second curl looping back over the first, creating a little swirling cloud-like flourish at the top of your wave.
Step 3: Continue the base line across the tile, adding more wave crests as you go — each one a loose, flowing curl sitting atop a gentle undulating line.
Step 4: Add small open circles beneath each wave crest, dotted along the base line like little bubbles or sea foam sitting at the foot of each wave.
Step 5: Draw small teardrop or leaf shapes tucked in between the wave crests, adding a sense of movement and filling in the spaces between each curl.
Step 6: Refine and ink over your final lines, leaving the guide lines behind. The finished result is a beautiful, flowing wave border with an elegant Japanese-inspired feel.
5th Zentangle Pattern

Step 1: Lightly place five evenly spaced circles diagonally across your tile, graduating in size from small at the top right to larger at the bottom left — these are your guide points.
Step 2: Connect the circles with a flowing S-shaped line that weaves between them, linking each one into a continuous diagonal chain.
Step 3: Add small clusters of tiny circles filling in the gaps along each side of the chain, nestling them snugly between the larger circles to begin building up the texture.
Step 4: Continue adding more small circles on both sides of the chain, varying their size to fill the spaces naturally — some tiny, some a little larger — so the band starts to feel organic and full.
Step 5: Keep building outward, packing circles of all sizes tightly around the chain until you have a broad, lush diagonal band of bubbles stretching across the tile.
Step 6: Finally, fill the background on either side of the band with solid black shading, making the white circles pop dramatically against the dark background for a bold, striking finish.
6th Zentangle Pattern

Step 1: Begin with two simple straight lines meeting at a right angle — just a small angular V or L shape near the top of your tile. This is the seed of your entire pattern.
Step 2: Extend the lines, adding another angled segment to begin forming a jagged, stepping spiral that starts to curve around itself.
Step 3: Keep following the spiral outward, adding pointed zigzag steps as you go — each new section slightly larger than the last, rotating around the centre like a pinwheel.
Step 4: Continue spiralling outward until you have a full, tightly wound geometric rose shape, with crisp angular points radiating from the centre in every direction.
Step 5: Add another full rotation of larger stepped sections around the outside, letting the spiral expand until it fills the tile completely, the outer petals reaching the edges.
Step 6: Shade the underside of each stepped section with soft pencil shading, darkening the trailing edge of every petal. This single finishing touch transforms the flat geometric shape into a breathtaking three-dimensional spiral that appears to lift right off the page.
7th Zentangle Pattern

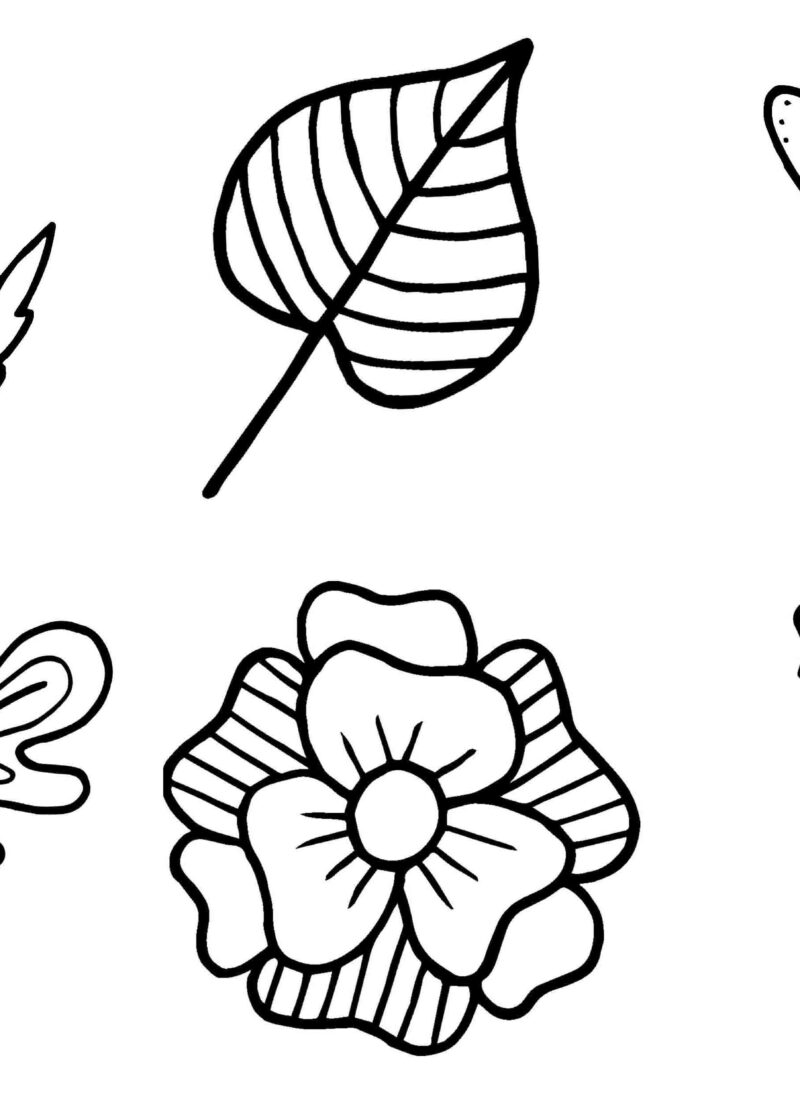
Step 1: Draw a small flower with five rounded petals at the centre of your tile, then add a decorative paisley-like curl beneath it — this elegant little motif is the heart of the whole design.
Step 2: Outline the flower with a scalloped border, following the shape of the petals closely, and add two small oval shapes on either side to begin framing the central motif.
Step 3: Draw a large circle rising up behind the flower and two sweeping curved lines arching down from either side to the bottom corners of the tile, like a wide open fan or peacock tail beginning to unfurl.
Step 4: Decorate the curved sections with evenly spaced small circles, dotting them along the arching lines to add a delicate, beaded quality to the flowing shapes.
Step 5: Add radiating lines fanning outward from behind the central flower, filling the large circle with a sunburst of evenly spaced strokes that give the pattern a glowing, energetic quality.
Step 6: Finish by adding scalloped edging along the lower curved arches and refining all the details — the result is a rich, ornate design with a beautiful henna or folk art feel.
8th Zentangle Pattern

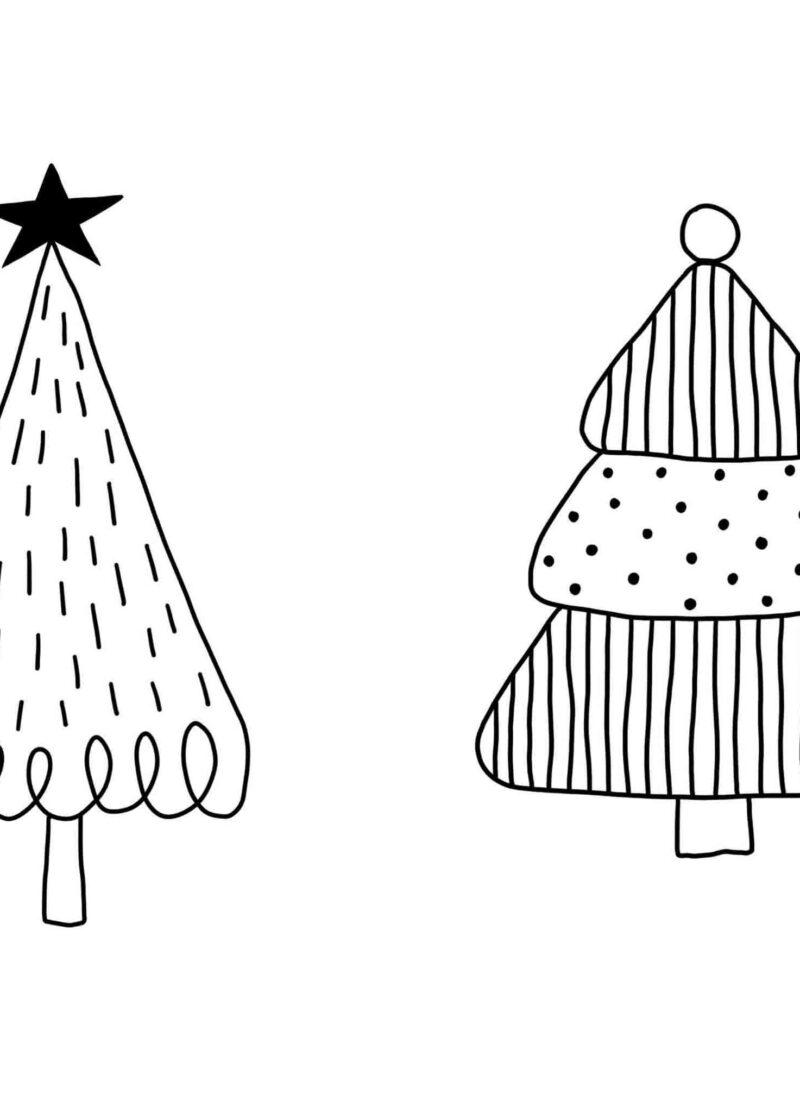
Step 1: Draw a neat 4×4 grid of equal squares across your tile — this is your foundation and keeps everything perfectly aligned.
Step 2: Add diagonal lines across each square, drawing corner to corner in one direction to divide every square into two triangles.
Step 3: Add the opposite diagonal to each square so every cell is now divided into four triangles, giving you a grid full of crisp X shapes.
Step 4: Working in a pinwheel pattern, select specific triangles in each group of four squares to create a rotating windmill effect across the grid.
Step 5: Fill alternate triangles with close parallel lines and the opposing triangles with solid colour, carefully following the pinwheel arrangement to keep the rotating pattern consistent across every square.
Step 6: Ink over your final choices — solid black triangles alternating with finely striped ones — and the finished result is a stunning geometric quilt-like pattern with a bold, satisfying sense of rhythm and movement.
9th Zentangle Pattern

Step 1: Draw a large teardrop shape — a gently rounded base curving up to a soft point at the top, with a diagonal stem extending from the tip.
Step 2: Draw a second, smaller teardrop inside the first, following the same shape and leaving an even gap between the two outlines.
Step 3: Add a third even smaller teardrop inside the second, and draw a short curved stroke at the centre — the beginning of a tiny inner spiral.
Step 4: Complete the inner spiral with a small solid dot at its heart, finishing off the layered teardrop motif into one neat, self-contained unit.
Step 5: Refine all three outlines into clean confident lines — your single motif is now complete and ready to be repeated.
Step 6: Arrange the motif outward from a central point in all directions, like petals of a flower, repeating and rotating it to fill the entire tile. Fill the background with dense stippling — tiny dots packed closely together — so the white teardrop shapes glow against the dark background in a stunning finished piece.
10th Zentangle Pattern

Step 1: Draw a large teardrop shape — a gently rounded base curving up to a soft point at the top, with a diagonal stem extending from the tip.
Step 2: Draw a second, smaller teardrop inside the first, following the same shape and leaving an even gap between the two outlines.
Step 3: Add a third even smaller teardrop inside the second, and draw a short curved stroke at the centre — the beginning of a tiny inner spiral.
Step 4: Complete the inner spiral with a small solid dot at its heart, finishing off the layered teardrop motif into one neat, self-contained unit.
Step 5: Refine all three outlines into clean confident lines — your single motif is now complete and ready to be repeated.
Step 6: Arrange the motif outward from a central point in all directions, like petals of a flower, repeating and rotating it to fill the entire tile.
Fill the background with dense stippling — tiny dots packed closely together — so the white teardrop shapes glow against the dark background in a stunning finished piece.
Pin me for later!
This comes to the end of out 10 step by step Zentangle patterns!
We hope these 24 step-by-step Zentangle patterns have given you plenty of inspiration to pick up your pen and get creative.
The beauty of Zentangle is that there truly are no rules — once you’ve worked through these patterns, don’t be afraid to mix and match elements, experiment with shading, or put your own unique spin on things. Every tile you create is completely your own
If you liked this post, be sure to check out our other Zentangle art posts below:
Create A Zentangle Art Page: Step By Step.
Easy Zentangle Flowers: 10 Fun Patterns To Doodle.
Create Easy Zentangle Art: A 10-Step Guide to Fun Patterns.
Be sure to give this post a share on Pinterest and give us a follow! Happy drawing!